Getting high-quality output
Steamshovel can produce high-quality graphics suitable for print or the web.
Size, scaling, and DPI
There are several related concepts at work when making graphics larger than the computer screen in front of you:
Actual size: The size in pixels of a digital image.
Apparent size: The size at which you expect the image to be viewed.
Density: The number of pixels per unit area. This is usually measured as dots-per-inch, or DPI, indicating the number of pixels along a linear inch. (Square this value to get dots per square inch.)
Scale: In steamshovel, pixel-sensitive displays can be scaled up to fit into a higher-density image. For instance, when the image density is doubled, text will be drawn at a doubled size to match the new scale, and solid lines will be drawn twice as many pixels thick. Steamshovel can automatically compute scaling factors when given a target density.
By way of example, here are three screenshots of the same scene, using different DPI and scaling settings. All three have the same apparent size.
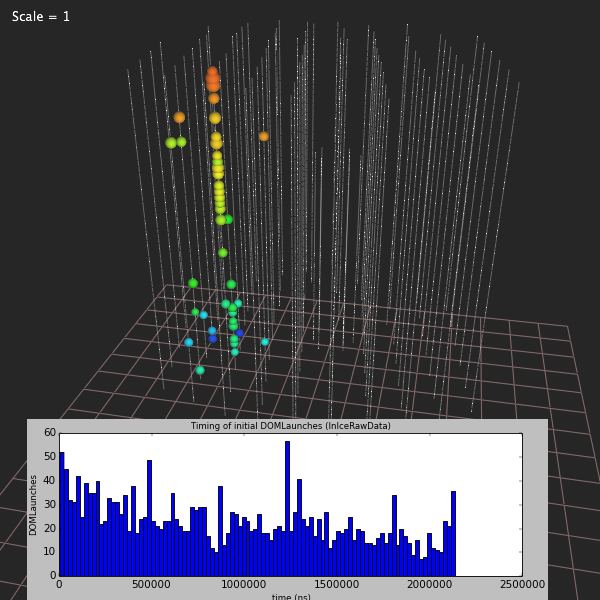
Image at 72 dpi, scale = 1.0. Actual size is 600x600 pixels.
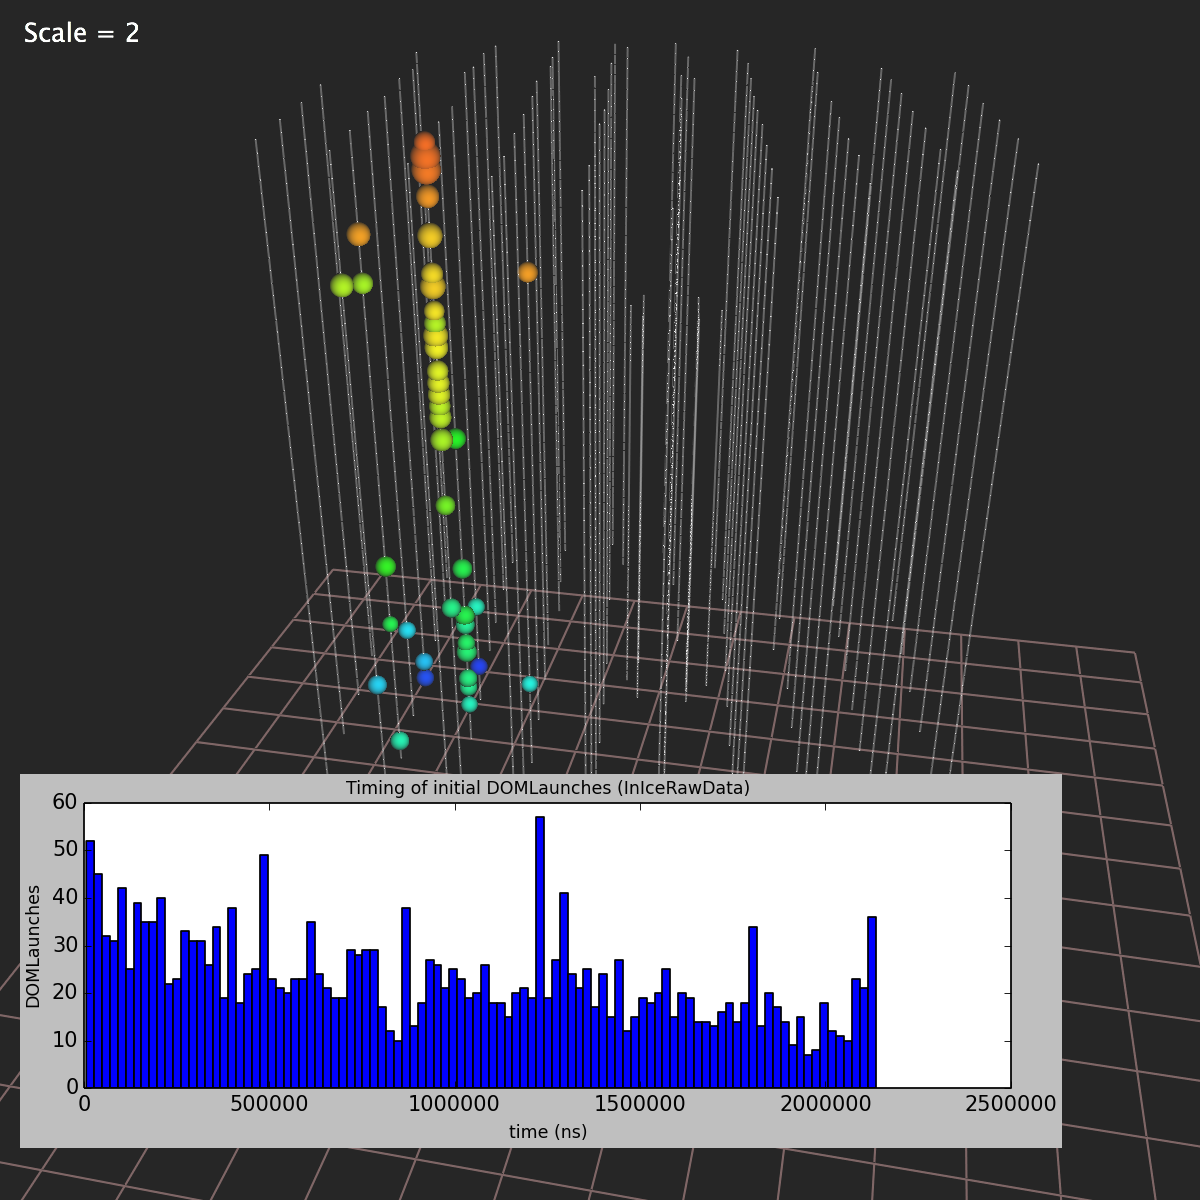
Image at 144 dpi, scale = 2.0. Actual size is 1200x1200 pixels.
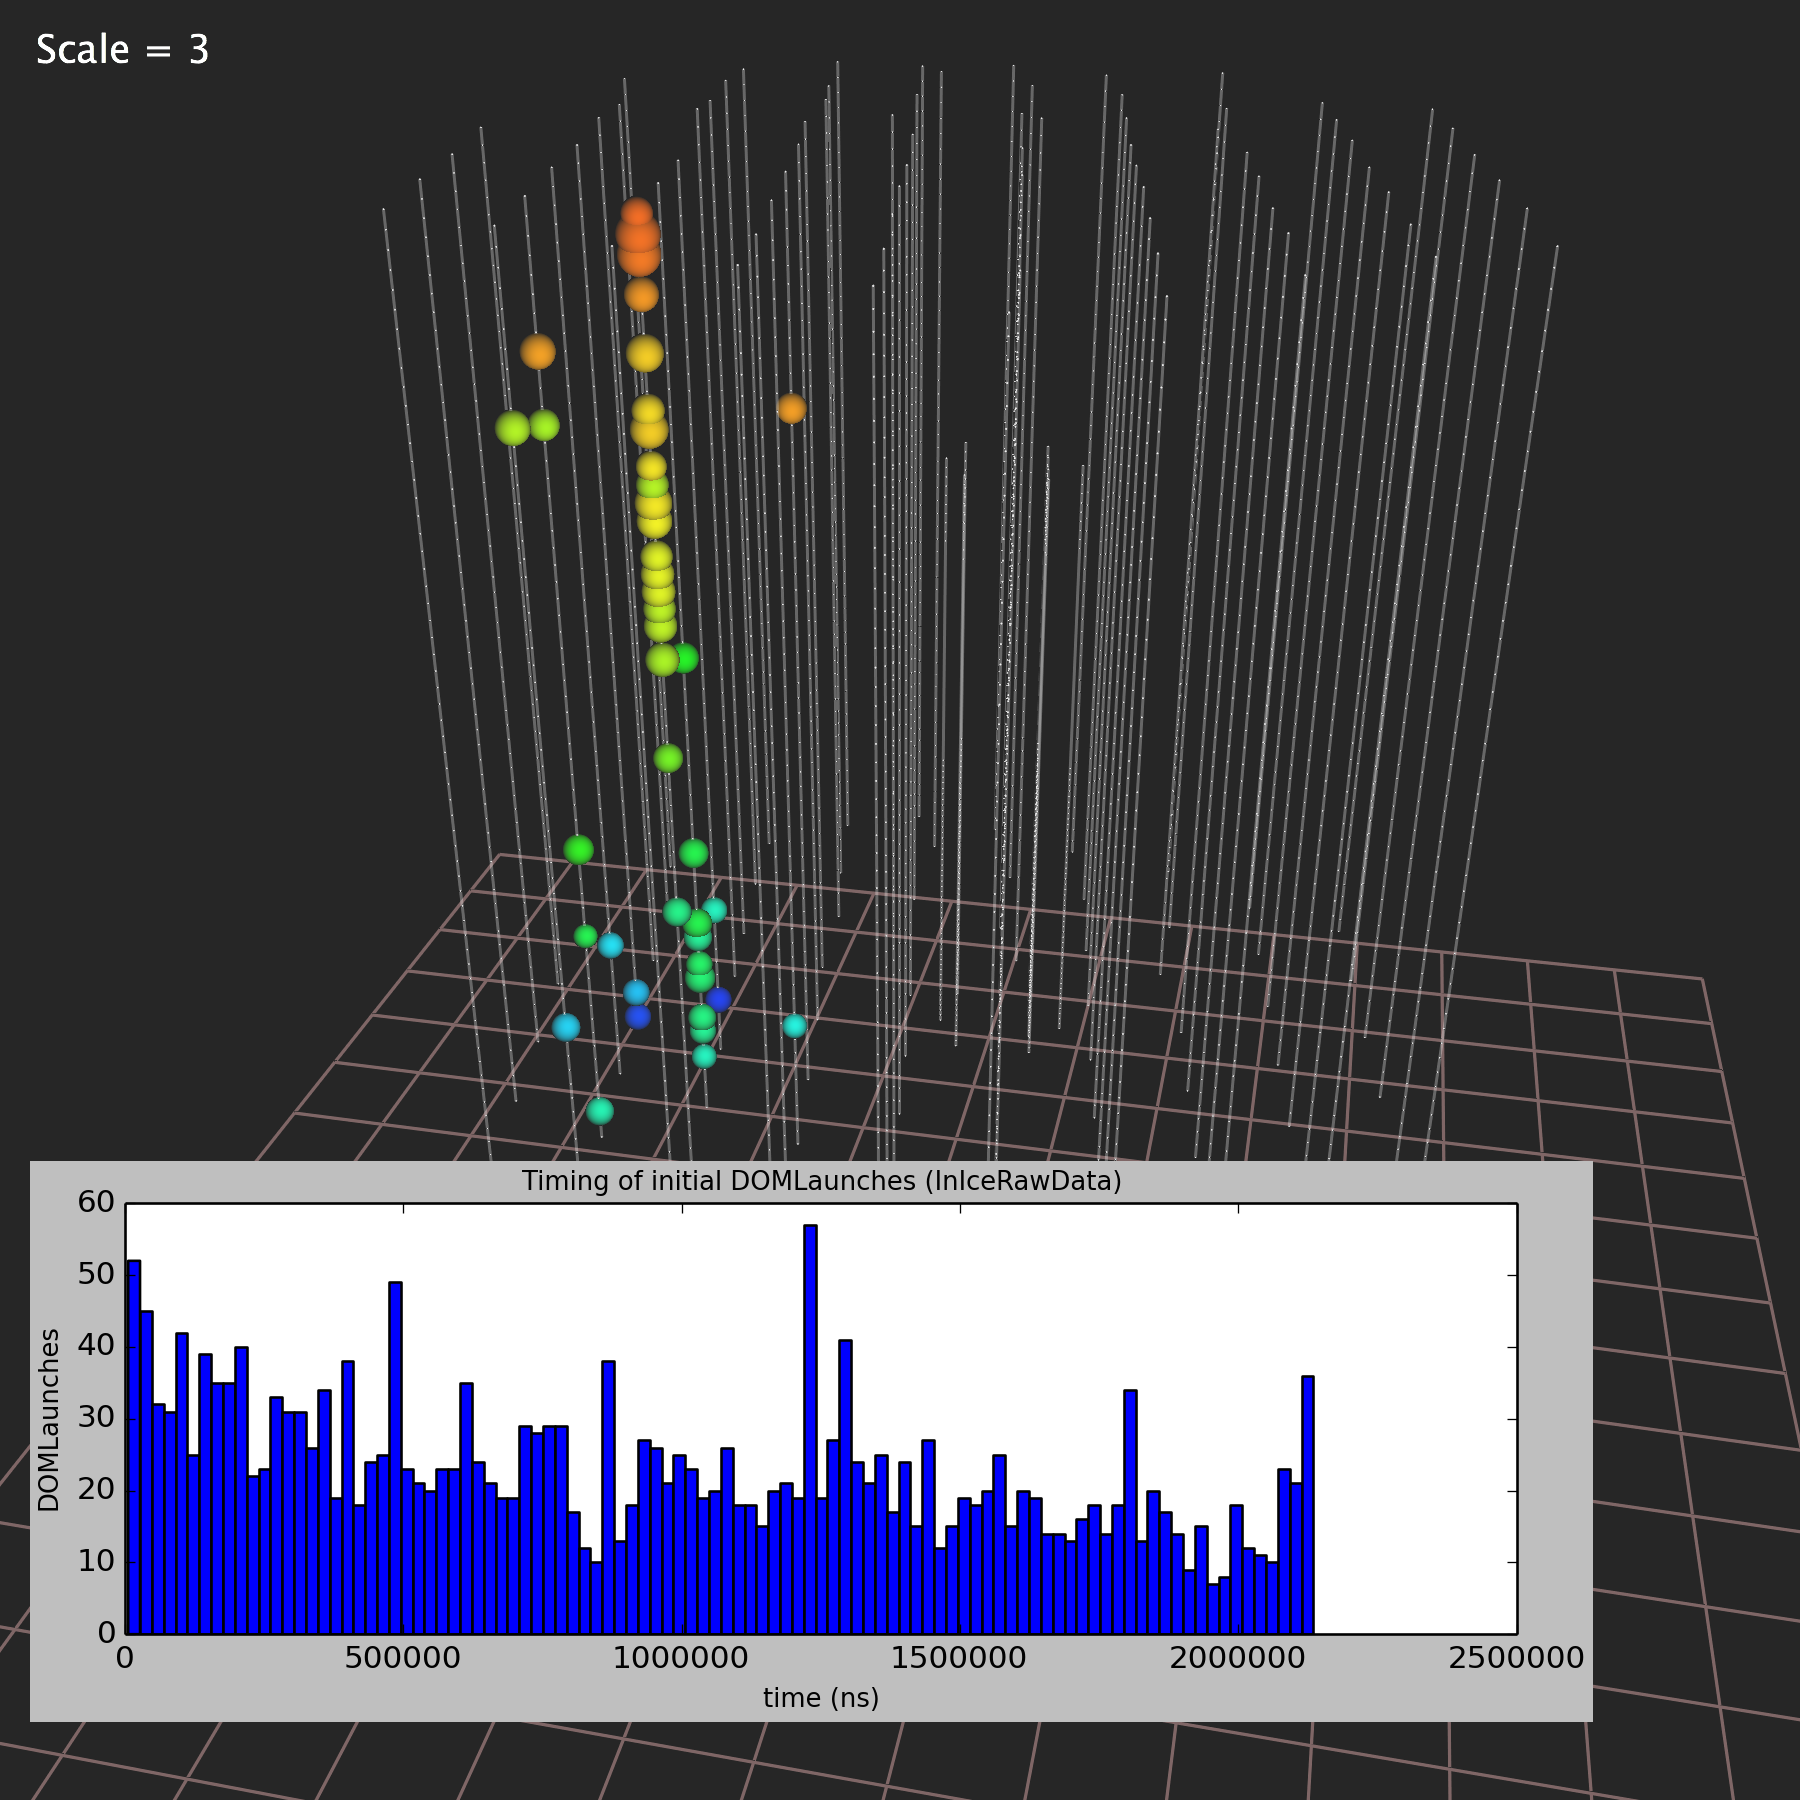
Image at 216 dpi, scale = 3.0. Actual size is 1800x1800 pixels.
Note that DPI is a concept that usually only applies to still images, so we only refer to density when discussing screenshots. Videos use the concept of scale to provide antialiasing (image smoothing).
Saving screenshots
To more easily capture the currently displayed event, choose the ‘Screenshot…’ item from the ‘Window’ menu. Except for the the table view, this will always store the data as it is currently displayed in Steamshovel. If the table view is active, then the 3D view is stored. No customisation is allowed for this kind of event capture, so this action is basically a shortcut for printscreen-and-crop.
Creating 3D event projections
Choose the ‘3D Projection…’ item from the ‘Window’ menu to see this dialog:
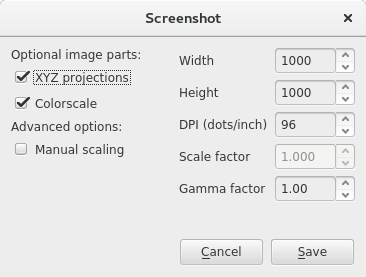
The main view, which is determined based on the COG of the event and the selected track, is always included.
XYZ projections are three smaller views, optionally included at the top of the image, with the event viewed from the top and two sides.
A colorscale can be included to show the time range and color mapping of the event.
Choose the width and height of your image: these are the bounding box of the image. Depending on the selected parts, the aspect ratio of the image will change, but it will always fit within these dimensions.
Choose a DPI. 300 is a common value for images that will be printed. For images that will only be used in digital form, the default is usually fine.
A scaling factor will be chosen automatically based on the DPI you specify. You can fine-tune it by selecting the checkbox.
A gamma factor different from 1.0 may be chosen. Only the PNG format supports it, and the result may vary from platform to platform and viewer to viewer. To read the story how PNG tried to fix something, but made it worse, see https://hsivonen.fi/png-gamma.
Images with a transparent background can be created in the following way:
Change the background color to solid black
Produce the screenshot
Open the screenshot in The Gimp
Go to the
Colorsmenu and choseColor to Alpha...Turn the color solid black transparent
Save the result as a PNG or a similar format that stores the alpha channel
Creating Movies
Choose the ‘Movie…’ item from the ‘Window’ menu to see this dialog:
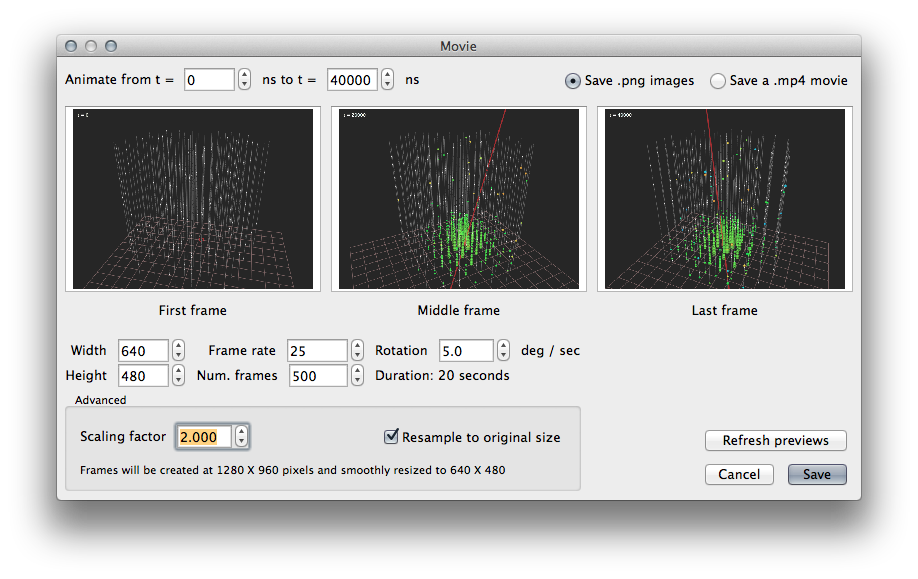
Movies can be saved as a set of png images for further custom processing, or directly as an .mp4, if ffmpeg or avconv are installed.
The best technique for creating a smooth, high-quality movie is as follows: Set the ‘Width’ and ‘Height’ settings to the desired output size of your movie. Set the ‘Scaling factor’ to a value larger than one – 2 or 4 are good choices. Finally, select ‘Resample to original size.’ This will cause your movie frames to be generated at a larger resolution and then downscaled, giving the movie a smooth, antialiased look.
Issues
There are some limitations imposed on steamshovel by the underlying graphics drivers, and for which there is no workaround at current. One is a limit on total image size. Steamshovel will do its best to reject screenshot requests that exceed the maximum size that it can deal with. However, in some cases, very large screenshots may come out black. The best solution is usually to make a small adjustment to the image size.
There exists a maximum width for lines drawn by Steamshovel, which varies from system to system. On some Macintosh systems, the maximum line width is 10 pixels. This means that lines cannot be scaled above this value, even in high-resoluton screenshots; it may occasionally cause wide lines to appear unexpectedly thin in high resolution outputs. The maximum line width is often much higher on Linux.
These limits can be investigated by reading the output of window.gl.debugInfo. See
the steamshovel scripting guide. Workarounds could be developed for these limits if
necessary, so please let the steamshovel maintainers know if they cause a serious problem for you.
